
Learning how to take Jasmine cuttings is one of the most rewarding and cost-effective ways to grow these wonderfully fragrant climbers in your UK garden. Whether you have a beautiful star jasmine, common white jasmine, or winter jasmine, propagating from cuttings allows you to create identical new plants that will have the same scent, flower colour, and growth habit as the parent. This detailed guide is written specifically for beginners and covers everything you need to know.


Why Propagate Jasmine from Cuttings??
Taking Jasmine cuttings is a popular method of propagating the plant. There are several reasons why people choose to take Jasmine cuttings:
- True-to-type plants: Cuttings produce exact genetic clones of the parent plant. This is especially important with jasmine because seedlings can vary greatly in scent strength and flowering performance, whereas cuttings guarantee you get the exact variety you love.
- Significant cost saving: Mature jasmine plants can cost £15–£40 each in garden centres. With cuttings, you can produce dozens of new plants from just one healthy parent for almost nothing.
- Insurance against winter loss: Many jasmine varieties are borderline hardy in the UK. Young plants raised from cuttings are more vigorous and better able to survive cold, wet winters than older, woody specimens.
- Rejuvenation of old plants: As jasmine plants age, they can become woody, tangled, and produce fewer flowers. Cuttings let you replace tired plants with fresh, compact, free-flowering young ones every few years.
- Relatively easy for beginners: Jasmine roots more readily than many other climbers, making it an excellent plant to practise propagation skills on.
When is the Best Time to Take Jasmine Cuttings?
The timing is crucial for success:
- Softwood cuttings (fastest): Late spring to early summer (May–July). The new growth is soft and roots quickly (3–5 weeks).
- Semi-ripe cuttings (most reliable): Mid to late summer (July–September). The stems are firm but still flexible — this is the best period for most UK gardeners.
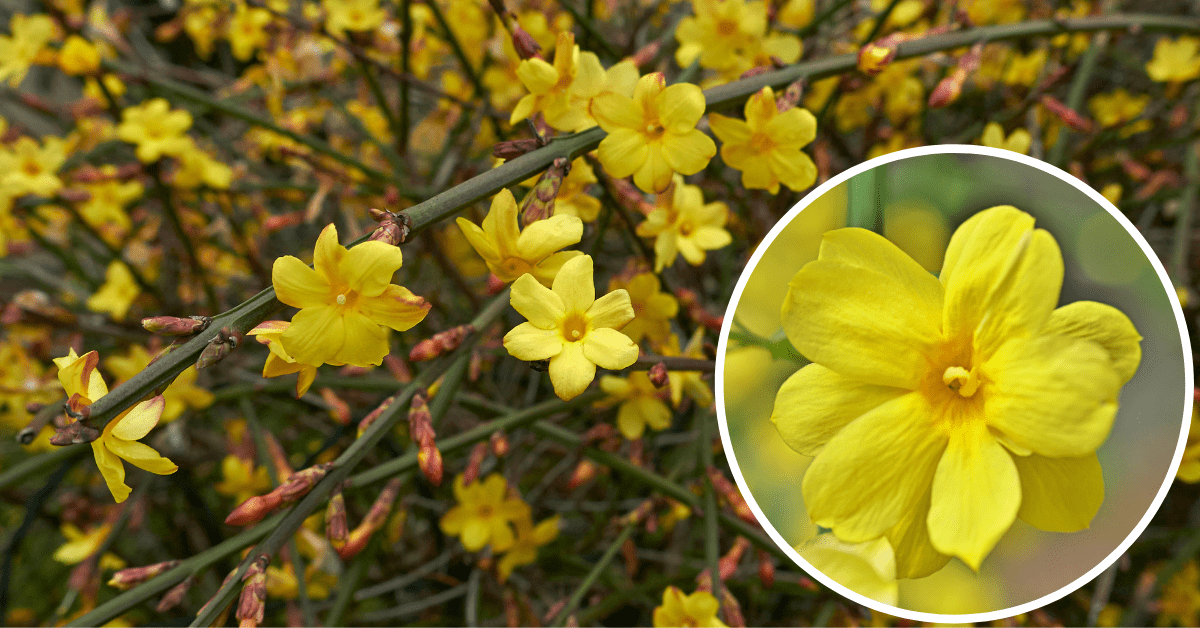
- Hardwood cuttings: Late autumn to winter (October–February) — best for winter jasmine (Jasminum nudiflorum).
Top recommendation: Take semi-ripe cuttings between July and early September for the highest success rate and strongest young plants.
Additionally, take cuttings early in the day when the plant is hydrated and the temperature is cooler. This will help reduce the stress on the plant and increase the chances of success for the cuttings.
How to Take Jasmine Cuttings?
Taking Jasmine cuttings is a relatively easy task, but it requires careful consideration to increase your chances of success. In addition, there are a few tools and materials needed, which you might already have available in your shed.
What You Need
- Sharp Cuttings Knife (Amazon link – opens in a new tab)
- Rooting hormone (Amazon link – opens in a new tab)
- Polythene bag
- Bright windowsill
- Potting mix
- 10-inch pots
- Gloves
Step 1 – Choose the Parent Plant
Select a healthy, vigorous jasmine plant that shows strong growth and no signs of pests or disease. Avoid plants that are suffering from drought, mildew, or nutrient deficiency, as stressed plants produce cuttings that root poorly.
Step 2 – Select and Cut the Stem
Choose non-flowering side shoots that are 10–15 cm (4–6 inches) long and still green and flexible.
- Cut just below a leaf node at a 45° angle — the angled cut creates a larger surface area for roots to develop and helps prevent rot.
- Make a clean, straight cut at the top, just above a node, to reduce die-back.
Step 3 – Prepare the Cutting
Remove the lower leaves, leaving only 2–4 healthy leaves at the top. This reduces water loss through the leaves while the cutting is trying to grow roots.
Gently scrape a thin strip of bark on one side of the base (called wounding) to expose the cambium layer — this often stimulates faster rooting.
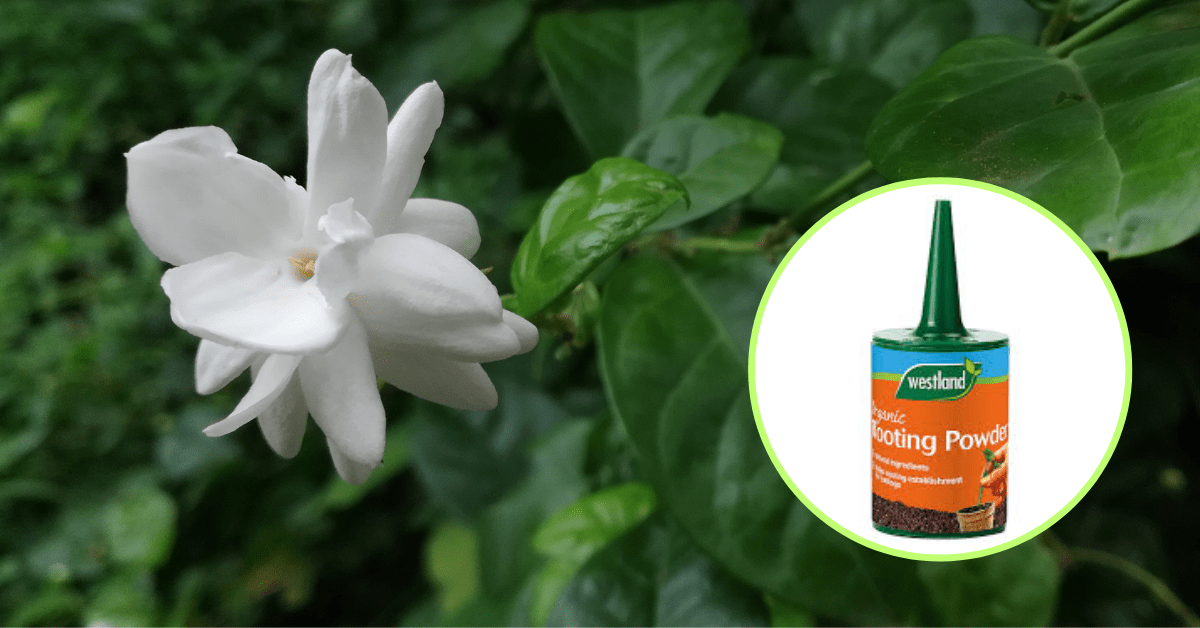
Dip the base in rooting hormone powder or gel. Jasmine responds very well to rooting hormone.
Step 4 – Plant the Cutting
Fill small pots with a well-draining cutting compost (50% peat-free compost + 50% perlite or grit).
Make a hole with a dibber or pencil, insert the cutting so at least two nodes are buried, then gently firm the compost around the stem.
Water lightly to settle the compost and label each pot with the variety and date.
Step 5 – Create Humidity
Cover the pot with a clear polythene bag (with a few ventilation holes punched in) or place it in a propagator. This maintains high humidity, which prevents the cutting from drying out before roots form.
Position in bright, indirect light — a north-facing windowsill or shaded greenhouse is ideal. Maintain a temperature of 18–24°C.
Step 6 – Aftercare
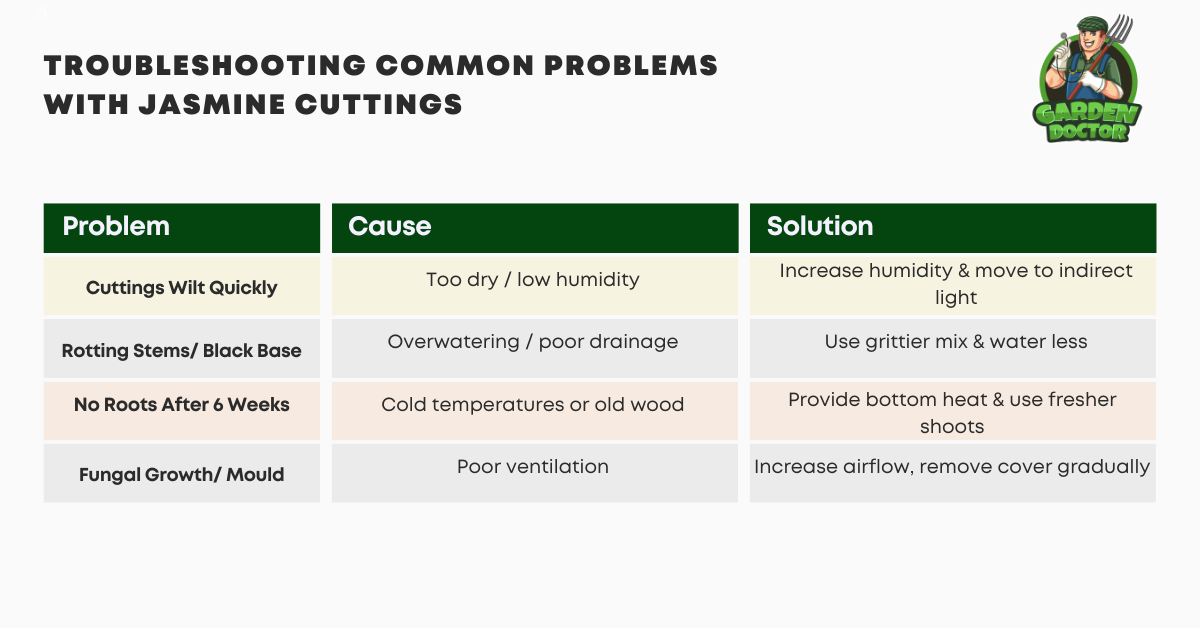
Keep the compost moist but never soggy. Mist the leaves lightly if they start to wilt.
Check the cuttings every week for fungal growth and remove any failing ones promptly.
Roots usually develop within 3–8 weeks. You can test progress with a very gentle tug.
Step 7 – Pot On and Harden Off
Once roots are well developed, carefully move each cutting into its own small pot with good-quality peat-free compost.
Gradually harden the young plants off over 10–14 days by increasing fresh air before planting them outside the following spring.
When Can I Plant My Jasmine Cuttings Outside?
This is one of the most frequently asked questions by beginners after taking jasmine cuttings. The answer depends on when you took the cuttings, how well they’ve rooted, and the UK weather in your area. Here’s a clear, practical guide:
Recommended Planting Times in the UK
- Early cuttings (taken May – July): These can often be planted outside in late summer to early autumn (August to early October), but only if the cuttings have developed a strong, healthy root system and the weather is still mild. The warm soil at this time helps them settle in before winter arrives.
- Main cuttings (taken July – September): This is the most common period for taking jasmine cuttings. These are best overwintered in protection and planted out the following spring (mid-April to late May) after the last frost has passed. This is the safest and most recommended approach for most UK gardeners.
- Hardwood cuttings (taken October – February): These are usually ready to plant out the following autumn (September – October) once they have spent a full growing season developing roots and strength.
How to Tell If Your Cuttings Are Ready to Plant Out
- The roots should be well-developed (visible through the drainage holes or you feel resistance when gently tugging the stem).
- The plant should have several sets of healthy new leaves and look strong.
- The cutting should no longer wilt when the humidity cover is removed for a few hours.
Essential Hardening Off Process (Don’t Skip This!)
Young jasmine plants raised indoors or in a propagator are very tender. You must gradually acclimatise them to outdoor conditions:
- Over 7–10 days, gradually increase ventilation by opening the polythene bag or propagator more each day.
- Move the pots outside during the day to a sheltered, shady spot and bring them back indoors at night.
- After a week of daytime exposure, leave them outside permanently (still protected from wind and heavy rain) for another 3–5 days.
- Only then plant them in their final position.
Skipping hardening off is one of the biggest reasons new cuttings fail after planting.
Garden Doctor Recommendation: For the vast majority of gardeners in the UK, planting out in spring (mid-April to late May) after proper hardening off gives the highest success rate. This timing allows the young plants to establish during the warmer months and build strength before their first winter.
Can You Propagate Jasmine Cuttings in Water?
Yes — and jasmine actually roots quite well in water. This method is simple and very visual, making it great for children or beginners who want to watch roots develop.
How to do it:
Prepare the cuttings as normal, then place them in a clean jar of room-temperature water (leave tap water to stand overnight first). Keep the jar on a bright windowsill out of direct sun. Change the water every 2–3 days. Once roots reach 4–5 cm long, pot them up carefully into compost and keep them humid for the first couple of weeks.
Note: While water propagation works well for jasmine, roots grown in water can be more fragile, so the compost method is generally more reliable for long-term success.
Conclusion
Whether you’re a beginner or an experienced gardener, propagating Jasmine cuttings is a great low-cost way to create new plants. The process is simple and can be done by just about everyone and by following the simple steps above, you can easily create new plants that will thrive in your garden.

Garden Doctor Tips
“If you can, take multiple cuttings from multiple plants to increase chances of success!”
“If you want to involve the kids, pop your cuttings in water so you can see the roots as they grow!”
“Remember not to leave the cutting in direct sunlight as this can cause the leaves to burn and the cutting will be unlikely to survive!”
“When covering, ensure that your cuttings are not touching the plastic. Being in contact with the plastic when wet can lead to rotting and other problems!”
Frequently Asked Questions
What potting mix do I need for Jasmine cuttings?
Like with many plants, Jasmine cuttings do best in a slightly acidic potting mix (6.0 to 6.5 pH). You can make your own potting mix or purchase a pre-made mix from a garden centre.
Can Jasmine be grown from cuttings?
Yes, Jasmine can be grown from cuttings. Cuttings from outdoor plants should be taken from this year’s hardwood growth during the winter.
Can you take cuttings from Jasmine?
Yes, you can take cuttings from Jasmine. This variety of flowers is very easy to propagate from cuttings, and in fact, taking cuttings is my favourite way to create new plants.
Author
Trevor Wright is not just a seasoned horticulturist; he’s the esteemed Garden Doctor. With a BSc in Horticulture and years of hands-on experience in the soil, Trevor has become a trusted mentor for all things gardening. As the founder of Garden Doctor, he’s committed to clarifying the intricacies of gardening, offering straightforward advice that’s rooted in years of practice. His writing is a garden of how-tos, savvy insights, and comprehensive guides that enable individuals to nurture and grow their garden dreams. When he’s not knee-deep in garden beds, Trevor is at his keyboard passing on his green-thumbed wisdom to budding gardeners, ensuring that the legacy of sustainable and joyful gardening blossoms far and wide.


